
Documentation for version 0.7
Schlossallee 1/7
5412 Puch bei Hallein
Austria
Contact
coati.io
mail@coati.io
QUICK START GUIDE
This short introduction will briefly guide you through the project setup and the user interface of Coati. The bullet point lists will tell you what to do:
- Keep on reading
Short description
Coati is an interactive source explorer that simplifies navigation in existing source code. Coati's aim is to give answers to all your questions about your source code. Coati first indexes your code and gathers data about its structure and then provides you a simple interface consisting of three interactive views, each playing a key role in getting information:

- Search: Use the search field to quickly find and select indexed symbols in your source code. The autocompletion box will instantly provide an overview of all matching results throughout your codebase.
- Graph: The graph displays the structure of your source code. It focuses on the currently selected symbol and directly shows all incoming and outgoing dependencies to other symbols.
- Code: The Code view displays all source locations of the currently selected symbol in a list of code snippets. Clicking on a different source location allows you to change the selection and dig deeper.
Coati currently only supports the language C and C++. Much of the UI design is therefore based on these languages and might change as soon as other languages are supported. For more information have a look at supported languages.
Starting up Coati
Once you installed Coati successfully you are ready to run the application.
- Run Coati
License Key Window
When running the full version of Coati for the first time you are greeted with the enter license window. You need to enter the license key you received via e-mail when you purchased your Coati license.

- Open up the e-mail you received when purchasing your Coati license.
- Copy & paste your license key into the text box and click Activate. The license key should follow the format shown by the placeholder text.
Start Window
On every start of Coati you are shown the start window. It allows for creating new projects or opening existing ones.

- Press New Project to continue creating a new project.
- or select the included recent project TicTacToe and continue with the UI Intro.
Creating a Project
When creating a new Coati project you will use the project setup wizard. This wizard splits the setup process into several subsequent steps.
The simplest way to set up a Coati project is:

- Pick your project's programming language, select the empty project option and click Next.

- Enter the project's name and location, define language standard and click Next.

- Provide the root directory that contains all your project's source and header files and click Next.

- If your project requires any external headers to compile (e.g. Boost for C++). Please provide the paths here and click Next.
- Your project will probably include system headers (e.g. STL). Please provide the paths at Global Include Paths or click Detect to automatically retrieve them.

- As last step a summary of all settings is shown. Click Create to close the dialog. Coati will start indexing your files now.
Source Indexing
Coati will now start indexing your source files, which might take a little while. The status bar will give you information about the progress. Otherwise the UI will be empty. Coati indexes all named symbols and their relationships throughout the provided source files.

- Wait until the indexing of your source files has finished.
- or Press ESC to stop indexing (Coati will provide all information gathered so far and the indexing can be continued later by refreshing).
After indexing has finished, Coati will show an overview of all indexed symbols in the graph view and some statistics in the code view. If the indexing yielded errors, the code view will display them. You can see the error message by hovering an error's location.

- Fix your errors and refresh to reindex the files with errors (Open Issue: As long as there was no change in the specific file, Coati won't reindex it, do a force refresh until fixed).
- or ignore them and continue with an incomplete index.
UI Intro
As already mentioned Coati's user interface is split into three main views. Their arrangement can be changed however you wish, you can even detach them from the main window and put them on different screens (see Window Widgets).

The three views show information about the currently selected symbol. The search field provides the name, the graph visualization shows its relationships to other symbols and the code view displays all locations the symbol gets referenced throughout the codebase.
Search Field
The search field allows for easy access to all indexed symbols. Use it to find all the classes and functions you wish to investigate. Apart from that is also holds the UI buttons for navigating back & forward as well as refreshing.

When entering a search query the autocompletion popup will provide you with a concise list of all matching symbols. Note that Coati uses a fuzzy matching algorithm, that allows you to skip characters while entering a query.

Graph Visualization
The graph visualization displays the currently selected symbol in an active state and all other symbols it shares relationships with. The visualization is made up of nodes and edges.
- Nodes: All named symbols in your source code will be displayed as different nodes, such as functions, classes or files. Nodes with members (like classes) can be expanded to show all their contents, the number at the expansion arrow shows how many members are hidden. Clicking a node will activate it and update all the views to the new selection. Dragging a node can be used to change its position.
- Edges: The relationships between the symbols are displayed as different edges, such as type use, function call or file include. Sometimes edges get bundled together and are displayed as an aggregation edge that shows a number of how many edges it contains. Clicking an edge will highlight its source location in the code view.

Colors:
The different node and edge types are also displayed using different colors. The default color scheme uses this convention:
| Color | Node | Edge |
|---|---|---|
| gray | types and classes | type use |
| yellow | functions and methods | calls |
| blue | variables and fields | variable access |
Hatching:
Nodes displayed with a striped hatching, are nodes that were used within your indexed source files, but were not defined. Clicking them shows all locations where they are used, without providing their declaration.

Code View
The code view displays all locations of the currently active symbol within the indexed source files. It does not allow for editing the source code. Syntax highlighting is used to increase readability. Source locations that are surrounded by a box when hovered can be clicked to activate the respective symbol. Active source locations are highlighted.
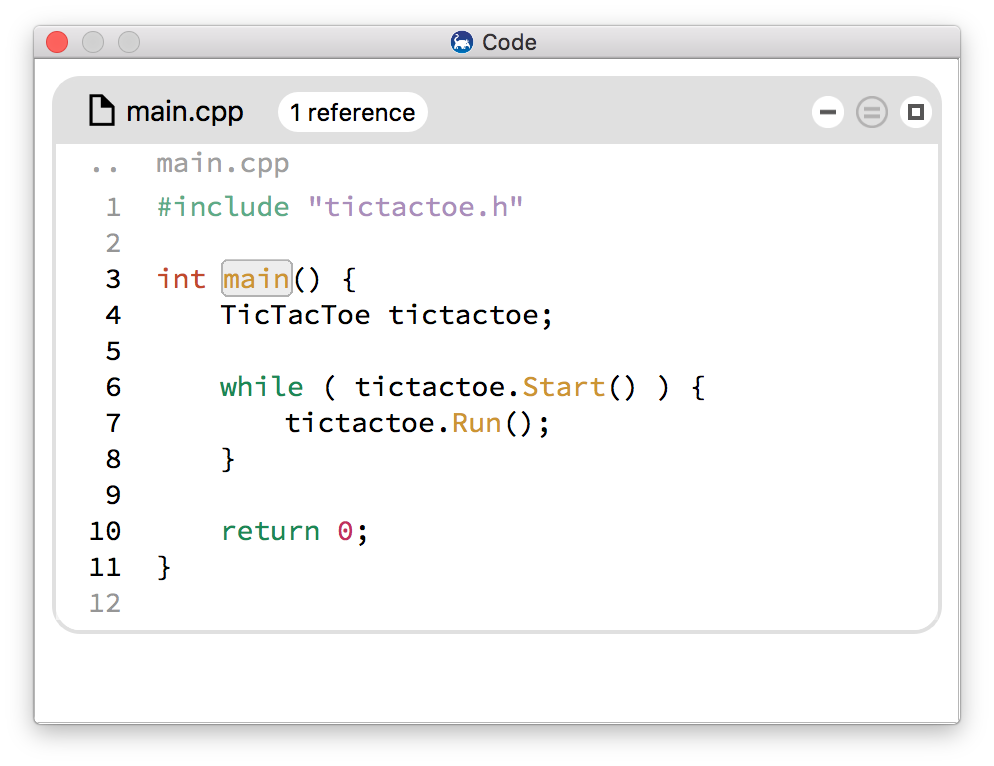
The source locations are displayed as code snippets, containing the line of interest and extra lines added to the top and bottom to give information about its context. Code snippets are then bundled together into files.
Note: A file can be selected as active symbol by clicking its name in the title bar. By clicking the icons on the right hand side of the title bar, the file can switch between 3 different states:
-
Minimized: The file does not show any content

-
Snippets: The file displays the snippets containing active locations separated by lines.

-
Maximized: The whole content of the file is visible.

For more information please have a look at Code View Files.
Start exploring!
After reading this quick guide, you know the basics of Coati's user interface and you are able to start exploring your codebase. Coati will allow you to see your source code from a whole new perspective, by giving you a concise overview of its parts and a faster way of drilling down to its internals, while always maintaining the connection to the implementation details of the actual source code.
For more detailed information please have a look at the much more extensive instruction manual below.
If you have feedback for us, please don't hesitate and let us know by writing to support@coati.io, we'd be glad to hear from you.
The Coati team wishes you a good start with our product, lots of saved time, increased productivity and much cleaner code.
- Start exploring & have fun!
INTRODUCTION
About this document
This document is the official documentation of Coati and explains everything you need to know about working with it.
If you have questions not answered by this document, please write us an e-mail to support@coati.io.
Supported Languages
C
C support is powered by Clang 3.8. If you have a problem loading C code, please have a look at Clang language compatibility or report a bug at our bug tracker.
C++
C++ support is powered by Clang 3.8. For more Information please visit Clang C++ Status. If you have a problem loading C++ code, please have a look at Clang language compatibility or report a bug at our bug tracker.
FAQ
Can I use Coati on confidental source code?
What happens to the indexed data?
Coati does two things with the data collected during indexing:
- The data is stored in the
.coatidbfile in the same directory as the.coatiprojectfile. This database file is used by Coati to serve its purpose of letting you navigate your source code. And it allows Coati to reopen the project without reindexing the source code every time. - Some of the data gets logged into a log file saved in data/logs. These logs can be useful to us for fixing bugs. We might ask for log information on bug reports, but you should only provide it, if your source code is not confidental.
INSTALLATION
On Windows
Download and open the zip file and extract its contents into a temporary folder of your choice. Run the setup.exe and go through the wizard. You can now launch Coati from your start menu.
On Mac
Download and open the Coati.dmg file and drag Coati.app into the applications folder. You can now launch Coati from your Applications.

On Linux
Download Coati.tar.gz file and extract it. To start Coati run the Coati.sh script. Coati creates a folder ~/.config/coati at the first run, this is the folder for Coati settings. To Install Coati run the setup/install.sh Script with sudo, it will install Coati to /opt/coati and create /usr/bin/coati symlink.
Data folder
The data folder holds certain files that are used by Coati to run the program. After following the installation instructions the data folder should be located in the following locations on your platform.
| Platform | Location |
|---|---|
| Windows | C:/Users/You/AppData/Local/Coati Software/Coati (used for dynamic data and settings) install_directory/Coati Software/Coati/data (used for static app data) |
| Mac | ~/Library/Application Support/Coati |
| Linux | ~/.config/coati |
Finding System Header Locations
On Windows
These files usually ship with your compiler. For the Visual Studio IDE the system headers can be found at:
path_to_visual_studio/VC/include/
If you don't use the Visual Studio IDE you can also try to find your system headers in a subdirectory of:
C:/Program Files (x86)/Windows Kits/
On Mac
Run this command in your terminal:
gcc -x c++ -v -E /dev/null
You will find the header search paths your compiler uses in the output between these two lines:
#include <...> search starts here:
.
.
.
End of search list.
On Linux
gcc -x c++ -v -E /dev/nullor
clang -x c++ -v -E /dev/null
You will find the header search paths your compiler uses in the output between these two lines:
#include <...> search starts here:
.
.
.
End of search list.
USER INTERFACE
Main Window
Widget Windows
Coati's three views are organized into Widgets Windows, which can be freely arranged within the Main Window or detached from it. Each Widget Window has a title bar displaying its name and 2 buttons for closing the Widget Window and for detaching it from the Main Window.

- Drag the Widget Window at the title bar to rearrange it within the Main Window, detach it or attach it again.
- Press the "x" icon to close the Widget Window. They can be reopened from the View Menu.
- Press the "□" icon to detach the Widget Window from the Main Window.
Statusbar
The Statusbar is located on the bottom of the Main Window and is used to convey information about Coati's status and currently running processes to the user.
If indexing yielded errors the status bar will display their count on the right side.

Interactions:
- Click on the error count to display the error locations in the Code View.
Windows
Start Window
On every start of Coati you are shown the start window. It allows for creating new projects or opening existing ones.
- Clicking New Project will lead you to Project Setup.
- Clicking Open Project will let you open an existing Coati project by choosing from a file dialog.
- Clicking on one of the Recent Projects will open this project. The list shows a maximum of 7 items ordered by recent first.
- Pressing ESC will close the window.
Path List Box
The Path List Box is a user interface element that is used within the Preferences Window and the Project Setup Wizard. It allows for entering a list of file and directory paths.

- Click the "+" icon to add a new path line.
- Click the "-" icon to remove a selected path line.
- Click a path line to select it.
- Enter the path by typing on your keyboard
- Click "..." within the path line to open a file dialog for choosing a file or directory path.
- Directly add multiple paths into the box by dropping elements from your filesystem.
Preferences Window
The Preferences window lets you define settings for all projects. You can open the Preferences from the menu via Help/Preferences.

| Setting | Description |
|---|---|
| Font face | Define the font face used throughout the UI |
| Font size | Set the font size used throughout the UI. It can also be changed with the actions in the View Menu |
| Tab width | Define the space width of tabs in the code view. |
| Indexer threads | Define how many parallel threads are used during indexing. |
| Header Search Paths | Set header search paths that are used for all of your projects (e.g. std headers). An option for automatic detection of these paths is available for Clang, GCC and the Visual Studio compiler. (For instructions on how to add paths manually see Path List Box. For instructions on how to find the system header paths see Finding System Header Locations.) |
| Framework Search Paths | Mac only. Define the search paths for .framework files for all of your projects. An option for automatic detection of these paths is available for Clang and GCC. (For instructions on how to add paths see Path List Box.) |
Project Setup Wizard
The Project Setup Wizard consists of a sequence of windows that let you create a new Coati project. After selecting the programming language for your project Coati offers several ways for you to provide all the required information.

- Select the language used in code project.
- Selecting a project type will determine how you enter all the required information.
- Clicking Cancel or pressing ESC will close the window.
- Clicking Next will take you to the next step of the setup process.
Create an Empty Project
This is the way to go if you just have some source files you want to index. In case you have a build instructions file, you might want to check out one of the other options for project setup described below.
Project Meta DataIn the first step you need to enter meta information about the project.

| Setting | Description |
|---|---|
| Name | The name of the project. This will also be the name of the .coatiproject file generated by Coati. |
| Location | Choose the location of the project file from the dialog. |
| Language | Select the language of your project. This setting is preselected according to your choice in the previous screen. (See Language Support) |
| Standard | Select the language standard that should be used for indexing your project. Usually the most recent language standard is preselected here. (See Language Support) |
- Clicking Cancel or pressing ESC will close the window and abort the setup process.
- Clicking Next will take you to the next step of the setup process.
- Clicking Previous will take you to the previous step of the setup process. All the information you entered will be saved.
Provide the paths that contain your project's files. Coati will index all the source and header files in the specified paths, including subdirectories.

| Setting | Description |
|---|---|
| Project Paths | Specify one or multiple locations that contain all the source and header files that should be indexed by Coati. (For instructions on how to add paths see Path List Box.) |
| Source File Extensions | Define the valid extensions for source files including the dot e.g. .cpp |
- Clicking show files will display a list of all the files Coati will index with the current settings.
- Clicking Cancel or pressing ESC will close the window and abort the setup process.
- Clicking Next will take you to the next step of the setup process.
- Clicking Previous will take you to the previous step of the setup process. All the information you entered will be saved.
Coati needs you to specify all the include paths the indexed source and header files rely on. The include paths are those paths your project's #include directives are relative to. If your project requires additional includes to compile (e.g. Boost for C++, etc.), please specify their location here.
Additionally you can also specify Global Include Paths, which will be used by all your projects. These are usually the paths to system headers, which can also be auto detected by choosing a compiler below and pressing detect.

| Setting | Description |
|---|---|
| Include Paths | These paths are used to find the files specified by #include directives. (For instructions on how to add paths see Path List Box.) |
| Lazy Include Search | When checked Coati also looks for included files within the project paths and all their subdirectories. Use this option if you are not familiar with the project to save yourself from figuring the projects include paths. Warning: When activated indexing speed is slower. |
| Global Include Paths | These Header Search Paths will be used in all your projects. (For instructions on how to add paths see Path List Box. For instructions on how to find the system header paths see Finding System Header Locations) |
- Selecting a compiler from the dropdown list below and pressing detect will automatically detect system include search paths used by this compiler and add them to the Global Include Paths.
- Clicking Cancel or pressing ESC will close the window and abort the setup process.
- Clicking Next will take you to the New Project Summary Window.
- Clicking Previous will take you to the previous step of the setup process. All the information you entered will be saved.
Coati needs you to specify the locations of .framework files, your indexed source and header files rely on.
Additionally you can also specify Global Framework Search Paths, which will be used by all your projects. They can also be auto detected by choosing a compiler below and pressing detect.

| Setting | Description |
|---|---|
| Framework Search Paths | These paths are used to find .framework files used by your project. (For instructions on how to add paths see Path List Box.) |
| Global Framework Search Paths | These Framework Search Paths will be used in all your projects. (For instructions on how to add paths see Path List Box. For instructions on how to find the system header paths see Finding System Header Locations) |
- Selecting a compiler from the dropdown list below and pressing detect will automatically detect system header search paths used by this compiler and add them to the Global Header Search Paths.
- Clicking Cancel or pressing ESC will close the window and abort the setup process.
- Clicking Next will take you to the New Project Summary Window.
- Clicking Previous will take you to the previous step of the setup process. All the information you entered will be saved.
Create a Project from Visual Studio Solution
If you already have a Visual Studio solution file, this is the way to go. Just select the solution file in the file picker and Coati will automatically analyze it to prepopulate the New Project Summary Window (this may take a second or two).
Create a Project from Compilation Database
If you are using CMake you can export compile commands by defining the CMAKE_EXPORT_COMPILE_COMMANDS flag and then use the exportet .json file for Coati project setup.
For non-CMake projects you can use Bear. Bear generates a .json file during the simulated build process. Bear has been tested on FreeBSD, GNU/Linux and OS X.
In the first step you need to enter meta information about the project and define the compilation database.

| Setting | Description |
|---|---|
| Name | The name of the project. This will also be the name of the .coatiproject file generated by Coati. |
| Location | Choose the location of the project file from the dialog. |
| Compilation Database | Select the compilation database .json for the project. Coati will index the project based on the compile commands in this file. If the compilation database changes you can Refresh Coati to the new files. |
- Clicking Cancel or pressing ESC will close the window and abort the setup process.
- Clicking Next will take you to the next step of the setup process.
- Clicking Previous will take you to the previous step of the setup process. All the information you entered will be saved.
In the next step you can see which source files are in the compilation database and define the locations of the corresponding header files.
Header files will only be indexed if they are included in one of the source files.

| Setting | Description |
|---|---|
| Source Files | Clicking show source files will show you a list of all source files in the compilation database |
| Header Paths | Specify one or multiple locations that contain the header files to the source files defined in the compilation database. (For instructions on how to add paths see Path List Box.) |
- Clicking Cancel or pressing ESC will close the window and abort the setup process.
- Clicking Next will take you to the New Project Summary Window.
- Clicking Previous will take you to the previous step of the setup process.
New Project Summary
This window appears at the end of the Project Setup Wizard to summarize all the information entered before. It is the same as the Edit Project Window.
Edit Project Window
This window displays all the information relevant for your Coati project.

| Setting | Description |
|---|---|
| Name | The name of the project. This will also be the name of the .coatiproject file generated by Coati. |
| Location | Choose the location of the project file from the dialog. |
| Language | Select the language of your project. This setting is preselected according to your choice in the previous screen. (See Language Support) |
| Standard | Select the language standard that should be used for indexing your project. Usually the most recent language standard is preselected here. (See Language Support) |
| Project Paths | Provide the paths that contain your project's files. Coati will index all the source and header files in the specified paths, including subdirectories. |
| Visual Studio Solution | Only when using Setup from Visual Studio Solution. Provide the path to your Visual Studio Solution. Clicking the refresh arrow inside the text box will refresh the Project Paths and the Header Search Paths below. |
| Compilation Database | Only when using Setup from Compilation Database. Provide the path to your Compilation Database. |
| Header Paths | Only when using Setup from Compilation Database. Provide the paths to the corresponding header paths of your Compilation Database. |
| Include Paths | Specify where Coati should be looking for included headers. |
| Lazy Include Search | If this checkbox is checked Coati also looks into the project paths (including subdirectories) when resolving #include directives. |
| Global Include Paths | Same as Header Search Paths but these are used application wide for all of your Coati projects. |
| Framework Search Paths | Mac only. Define the search paths for .framework files for your project. (For instructions on how to add paths see Path List Box.) |
| Global Framework Search Paths | Mac only. Same as Framework Search Paths but these are used application wide for all of your Coati projects. |
| Advanced Setting | Description |
|---|---|
| Compiler Flags | Define compiler flags used during indexing e.g. -v |
| Source File Extensions | Define extensions for source files including the dot e.g. .cpp |
| Exclude Paths | Define files and directories that should not be indexed by Coati, although they appear in the Project Paths. |
- Clicking Cancel or pressing ESC will close the window and abort the setup process.
- Clicking Create will check your inputs, save the new project file and start indexing the source files.
- Clicking Previous will take you to the previous step of the setup process. All the information you entered will be saved.
Enter License Window
The Enter License Window appears on your first start of Coati and is used to enter and check your Coati license key.
- Copy and Paste your license key from your "Coati 0 License Key" e-mail into the textfield. The key should be formated as shown by the placeholder text.
- Clicking Activate will check if your license key is valid and close the window. Otherwise an error message will be displayed.
Menu
Structure
Project
-
New Project
- Shortcut: New Project
- Opens the New Project Dialog to define a new project and loads it after creation.
-
Open Project
- Shortcut: Open Project
- Opens a file dialog to choose an existing Coati project file from your system's hard drive.
-
Recent Projects
- Opens a submenu to choose recent opened Coati projects.
-
Edit Project
- Opens the Edit Project Window prefilled with your project settings and allows for changing them.
-
Exit
- Quits Coati.
Edit
-
Back
- Shortcut: Back
- Undoes the last navigation action.
-
Forward
- Shortcut: Forward
- Redoes an undone navigation action.
-
Refresh
- Shortcut: Refresh
- Refresh will check all indexed source files for updates and reindex the ones that changed and their depending ones.
-
Force Refresh
- Shortcut: Force Refresh
- Force Refresh will reindex the whole project.
-
Find Symbol
- Shortcut: Find Symbol
- This option will put the focus into the search field, so you can start typing your search query. Alternatively you can click the search field.
-
Find Text
- Shortcut: Find Text
- This option will put the focus into the search field and start a new full text search query
-
To overview
- Shortcut: To overview
- This option will display the overview of the project.
View
-
Show Title Bars
- Toggle the visibility of the bars above each Window Widget.
-
Search Window
- Toggle the visibility of the Search Window. This can also be done by closing the Search Window on clicking the "x" icon in it's title bar. (See Window Widgets)
-
Graph Window
- Toggle the visibility of the Graph Window. This can also be done by closing the Graph Window on clicking the "x" icon in it's title bar. (See Window Widgets)
-
Code Window
- Toggle the visibility of the Code Window. This can also be done by closing the Code Window on clicking the "x" icon in it's title bar. (See Window Widgets)
-
Larger Font
- Shortcut: Larger Font
- Increase the font size within the Main Window's user interface.
-
Smaller Font
- Shortcut: Smaller Font
- Decrease the font size within the Main Window's user interface.
-
Reset font size
- Shortcut: Reset font size
- Decrease the font size to the original size.
-
Switch Color Scheme
- Opens a file dialog to choose another color scheme XML file. The color schemes are located in data/color_schemes/.
Help
-
About
- Shows copyright information about Coati.
-
Documentation
- Opens the documentation of Coati in your web browser by URL.
-
Bug Tracker
- Opens Coati's bug tracker in your web browser by URL.
-
Licences
- Documents which third party licences Coati is using.
-
Enter License...
- Opens the Enter License Window.
-
Preferences
- Shortcut: Preferences
- Opens the Preferences Window.
Shortcuts
| Shortcut | Windows | Mac OS X | Linux |
|---|---|---|---|
| Preferences | Cmd + , | ||
| New Project | Ctrl + N | Cmd + N | Ctrl + N |
| Open Project | Ctrl + O | Cmd + O | Ctrl + O |
| Close Window | Alt + F4 | Cmd + W | Ctrl + W |
| Hide Window | Cmd + H | ||
| Refresh | F5 | Cmd + R | F5 |
| Force Refresh | Shift + F5 | Cmd + Shift + R | Shift + F5 |
| Back | Ctrl + Z / Backspace | Cmd + Z / Backspace | Ctrl + Z / Backspace |
| Forward | Ctrl + Shift + Z | Cmd + Shift + Z | Ctrl + Shift + Z |
| Find Symbol | Ctrl + F | Cmd + F | Ctrl + F |
| Find Text | Ctrl + Shift + F | Cmd + Shift + F | Ctrl + Shift + F |
| To overview | Ctrl + Home | Cmd + Home / Cmd + Up | Ctrl + Home |
| Larger Font | Ctrl + + | Cmd + + | Ctrl + + |
| Smaller Font | Ctrl + - | Cmd + - | Ctrl + - |
| Reset Font Size | Ctrl + 0 | Cmd + 0 | Ctrl + 0 |
Graph View
The graph view visualizes the currently selected symbol and all its relationships to other symbols as an interactive graph visualization.

Interactions:
Panning:- Drag the background area with the mouse.
- Scroll left-right and up-down on the mouse pad.
- Use the keys W A S D.
- Hold Shift and scroll with mouse wheel or mouse pad.
- Press Shift + W or Shift + S.
- Press 0 to reset zoom.
Nodes
Colors are corresponding to the default color scheme.
| Node Type | Image |
|---|---|
| File |  |
| Type & Template Parameter |  |
| Typedef |  |
| Class & Struct: Display their members nested, and separated by access type: public, protected, private. By default only members with edges are shown. The arrow icon allows to expand and collapse them. The number tells how many nodes are hidden. |  |
| Variable & Field |  |
| Function & Method |  |
| Enum |  |
| Undefined: Nodes that were not defined within the indexed files are shown with hatched background. | |
| Bundle: A bundle node combines multiple nodes to reduce the size of the graph visualization. The name describes what kind of nodes are bundled. The number tells how many nodes are bundled. | 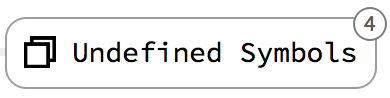 |
- Click a node to activate it.
- Drag a node to change its position.
- Click the arrow icon in class nodes to expand and collapse it.
- Click a bundle node to expand it.
- Hover a node to see a tooltip that displays the node’s type.
Edges
Colors are corresponding to the default color scheme.
| Edge Type | Image |
|---|---|
| File Include |  |
| Type Use | 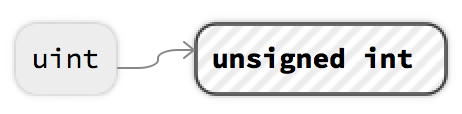 |
| Variable Use |  |
| Function Call |  |
| Inheritance |  |
| Method Override |  |
| Template Parameter Use & Template Argument Use |  |
| Aggregation: Bundles multiple edges between the child nodes of the 2 nodes. The thickness gives an impression of how many edges are bundled. Hover the edge to get the number of bundled edges. |  |
- Click an edge to see its location in the Code View.
- Click an aggregation edge to activate all its corresponding edges.
- Hover an edge to see a tooltip that displays the edge’s type.
Code View
The code view displays the corresponding source code of the currently selected symbols. The code view contains a list of one or more files.
- Scroll up and down to see the different source files.
Files
Each file has a title bar with the file's name and buttons to change its display state. There are 3 different states:
-
Minimized: The file does not show its content.
- Snippets: The file displays the snippets containing active locations separated by lines.
- Maximized: The whole content of the file is visible.
- Hover the title to see the full file path.
- Click the title to activate the file's corresponding node.
- Click one of the three icons on the right to change the display state of the file.
Snippets
A code snippet contains the lines of interest for the currently active symbol surrounded by some more lines to provide some context. Other symbols that were indexed by Coati are framed by a box when hovered. Here Coati distinguishes between local symbols and symbols that can be related to any other part of the code base. In case the snippet is part of a class, function or namespace, an additional line at the top of the snippet provides information about the snippet’s context (e.g. the surrounding scope).

- Click the top line to show the whole scope around the snippet.
- Click a boxed symbol to activate it.
- Click a boxed local symbol to highlight all its usages in the visible code.
Search View
The Search View contains the search field and some other related user interface elements.
Back & Forward
The left Backward button lets you undo your last navigation actions (see Back) and the right Forward button lets you redo your undone navigation actions again (see Forward). Both buttons are only enabled when the respective actions are available at the moment.

- Hover the buttons to see a tool tip.
- Press the buttons to execute the respective action.
Refresh
The left refresh button allows you to refresh the current project and reindex all updated files (see Refresh). With the right auto refresh toggle button you can activate automatic refresh, which will reindex all updated files whenever you put window focus on Coati's Main Window.

- Hover the buttons to see a tooltip.
- Press the left refresh button to refresh the project.
- Press the right auto refresh button to toggle automatic refreshing.
Overview Button
Show the overview screen, which gives a summary of the loaded project. The overview screen is shown after the project was loaded. Alternatively use the shortcut To overview.

- Press the overview button to show the project overview.
Search Bar
The search bar allows you to enter search requests to find one of Coati's indexed symbols. It doesn't allow for full text searching across all files so far. The search field allows for most text editing interactions common to text fields. When typing your request the Autocompletion Popup will show you search results matching to your entered string.

- Focus the search field by clicking it or using the Find Symbol action.
- Enter your search request by typing on your keyboard.
- By pressing enter or clicking on the search icon on the right you send your request.
- The search field allows for most interactions known from other text fields such as moving the cursor, copy&paste and text selection.
Autocompletion Popup
The Autocompletion Popup displays all Nodes matching your search request within all indexed symbols. The match results are determined by a fuzzy matching algorithm, that allows you to skip characters. The popup shows which characters in the words are matching and displays their corresponding node color. The node type is displayed on the right.
- Use the up and down arrow keys to switch between search results.
- Pressing tab or clicking on the search result will insert it into the search field.
- Pressing enter will select the search result and send the search request.
Keywords
Additionally the search view provides specific keywords that select a certein group of symbols.
| keyword | effect |
|---|---|
| overview | Shows an overview of all indexed symbols in the graph view and some statistics in the code view. |
| error | Shows all errors in the code view. |
Full text search
Search for a certain string in all indexed files by putting ? at the front of your search query. The default full text search is case-insensitive, use ?? to search case-sensitive.

- Start a query with
?or use the Find Text action to do a case-insensitive full text serach. - Start a query with
??to do a case-sensitive full text search.
CODE EDITOR PLUGINS
In order to make Coati the perfect partner for your development workflow you can connect Coati with different code editors. You can find the plugins in Coati's download package located in the folder /ide_plugins. Have a look at the following list of supported code editors to find out what editors are currently supported.
We are eager to expand the range of supported editors, so if you can't find a plugin for the code editor you are using, please let us know by writing to support@coati.io.
Supported Editors:- Sublime Text 2
- Sublime Text 3
- Visual Studio 2012
- Visual Studio 2013
- Visual Studio 2015
The communication between Coati and the code editor is achieved using a local TCP connection. Coati uses the port 6667 to listen for incoming messages. Outgoing messages will be sent to the port 6666.
Outgoing messages are in the form:
moveCursor>>absolute/file_path>>line_number>>column_number<EOM>
Incoming messages are in the form:
setActiveToken>>absolute/file_path>>line_number>>column_number<EOM>
From Coati
If you want your editor to open a file at a specific location from within Coati, you can achieve this by either selecting the option Set IDE Cursor from the right-click menu in the Code View or by simply clicking into a line in the Code View while holding down the Ctrl or Cmd key.

To Coati
By using a Coati plugin for your code editor, you can select a location within a source file and Coati will show you all symbols found at this location. Please have look at the list below to see which plugins are currently available and how they are used.
Sublime Text
InstallationTo install the Coati plugin for Sublime Text copy the CoatiPlugin folder located in your ide_plugins/sublime_text to your SublimeText/Packages folder and restart Sublime.
If you want Sublime to activate a certain element in Coati, click a location to place the cursor, right-click to bring up the context menu and choose the “Coati - Set active Token” option. Please note that the position of the cursor will be sent to Coati and not the position you opened the context menu at.

Vim
Please visit the vim-coati repository on Github for details.
Eclipse
Installation
- In Eclipse go in the menu to
Help -> Install new Software... - Add the Coati Updatesite
- type https://CoatiSoftware.github.io/eCoati/updatesite
into the
Work with:field - or press
Add...and add the address above - Select all and finish the next step.
- Eclipse needs to restart and can now communicate with Eclipse.
If you want Eclipse to activate a certain element in Coati, right-click that element to bring up the context menu and choose the “Set active Token” option.

Clion/IntelliJ
Installation
- Go to File -> Settings
- Plugins -> Browser Repositories
- Search for coati
- Install idea-coati Use
If you want IntelliJ/CLion to activate a certain element in Coati, right-click that element to bring up the context menu and choose the “Sent Location” option.

Visual Studio
InstallationTo install the Coati plugin for any version of Visual Studio, just execute the corresponding vsix file located in your ide_plugins/visual_studio.
If you want Visual Studio to activate a certain element in Coati, right-click that element to bring up the context menu and choose the “Set active Token” option.
